Following on from my post on learning the appropriate settings for CFD-ACE+ in multi-physics I’ve written this post after tearing my hair out for a week as I attempted to get started with GPUSPH v4.1. Again, in hindsight the solution was obvious but as this was my first Smoothed Particle Hydrodynamics Simulation outside of the ESI PAM suite the subtle differences tripped me up. This work is based on the suggested pathway of Salome and Crixus to pre-process; with GPUSPH performing the simulation and the results visualised in Paraview – a 100% open source pathway!
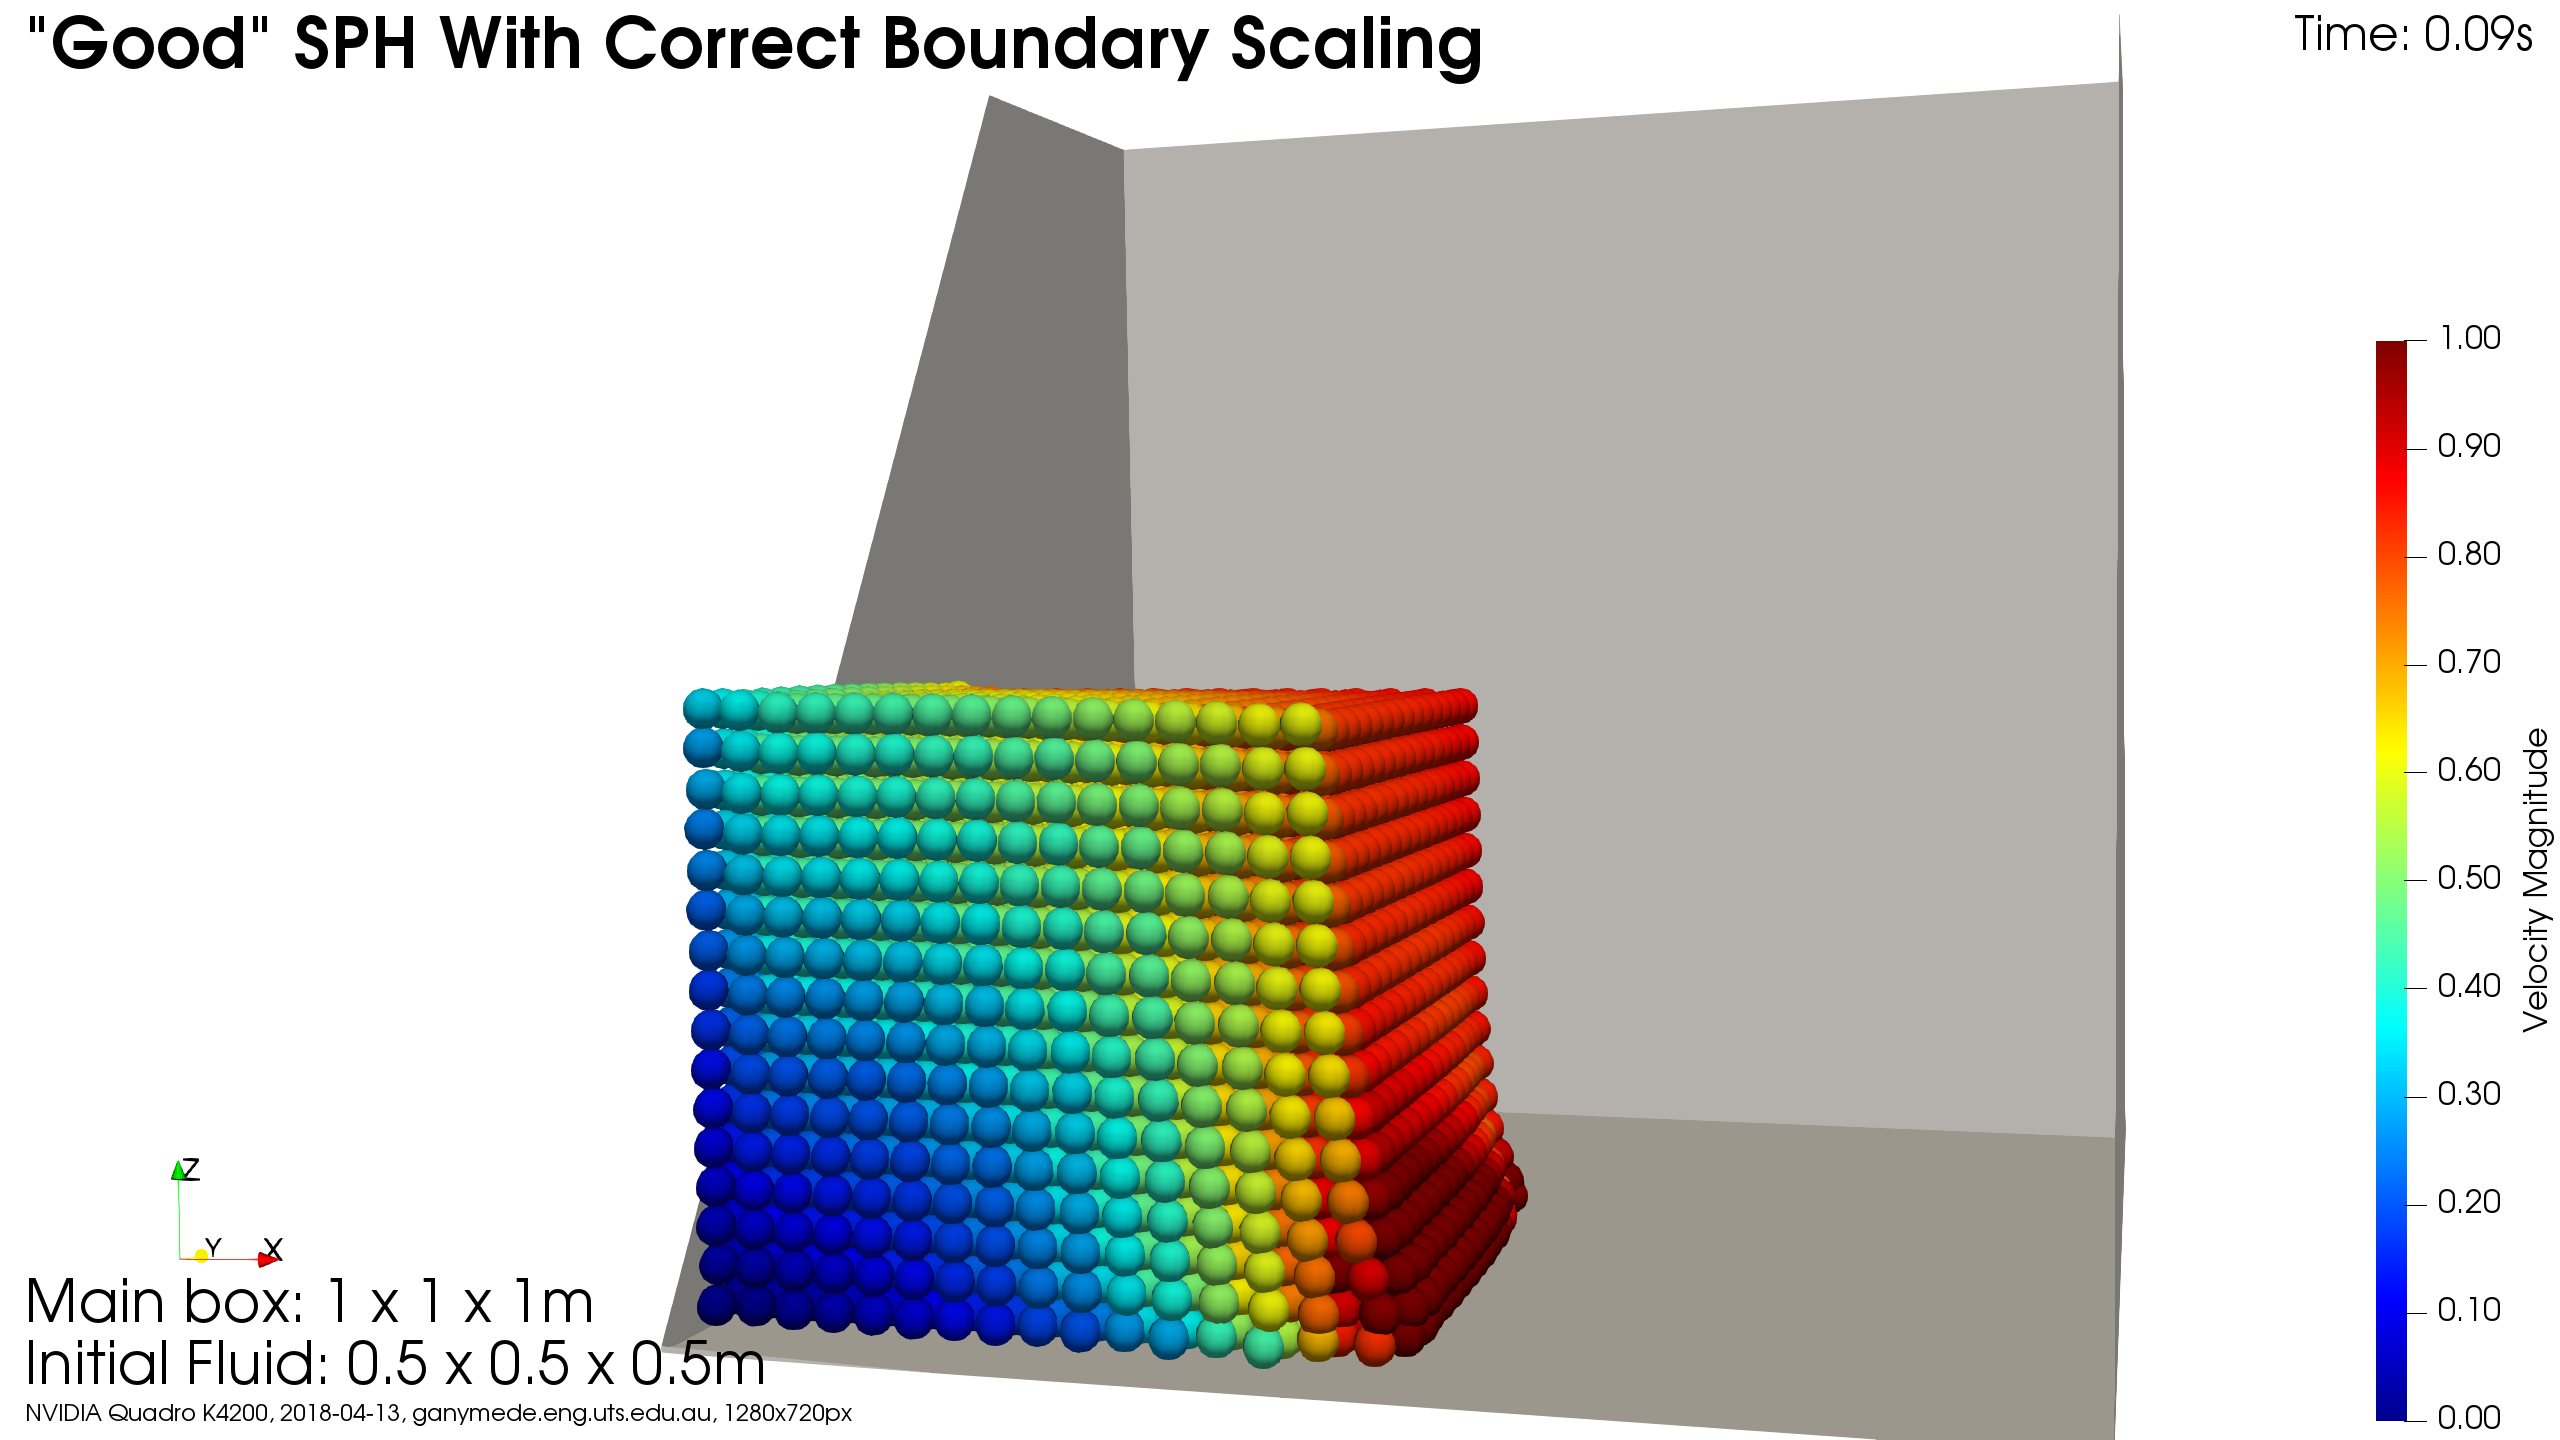
When initially working with a new code, I like to start really simple to get a handle before jumping full in. In this case, a simplified dam break case seemed a good place to start. The geometry is simple to mesh and I can run the simulation with very small numbers of particles – nice and quick all round. There are some benchmark animations on the GPUSPH site and if you want the full, technical details of the dam break case, you can head over to the SPHERIC benchmark page to download “Test Case 2”. However, I simplified this further and decided to focus on a 1 x 1 x 1m square “bucket” with the lower left corner initially filled with water, as shown below.
How hard can this be? I use both Salome and Paraview all the time for OpenFOAM, the documentation is pretty good for GPUSPH. Well apparently, it can be quite hard! Check out the animation below for what should not happen – water does not accelerate off stationary walls into space. At least after that initial acceleration the fall back under gravity looks okay. But the simulation did crash after a few particles accelerated completely out of the computational domain.
Time to brush off the usual debugging questions:
- Was the gravitational vector set correctly? Yup!
- Were the walls fixed and not moving? Yup!
- Was there any initial velocity applied to the fluid? No!
- Any strangeness with CUDA compilers and versions run on different hardware? No, all good there – besides the test cases from the GPUSPH crew ran perfectly.
Next up then as there was nothing jumping out from either the CUDA C++ or the initial conditions maybe I was still doing something wrong with the wall conditions. The logical step then seemed to be to move the initial block of fluid away from the wall and into free space. This should eliminate wall effects but still check general movement under the influence of gravity. As can be seen in the video below in this case everything ran as expected – the suspended block of fluid dropped under the influence of gravity and, most importantly, interacted with the walls as expected.
Incidentally, you can ignore the unphysical waves that are propagating across the fluid when it should be calming across the bottom because this simulation is massively under-resolved. There is only some 4000 particles and the waves are expected to damp out as the particle count is increased.
Right. At this point its pretty obvious that I’m doing something wrong with the initial conditions. After much wailing and gnashing of teeth it hit me that my problem was that in my naïvety I’d defined the initial condition box inside Crixus such that the first particles were coincident with the wall with no accounting for inter-particle spacing, see below and in particular the disparity between dr and fill_0. For reference three of the walls are along the x = y = z = 0 plane.
[mesh]
stlfile=/home/pbrady/jobs/2018-0002/cad/testThreeBox.stl
dr=0.03
swap_normals=false
zeroOpen=false
[fill_0]
option=box
xmin=0.00
ymin=0.00
zmin=0.00
xmax=0.50
ymax=0.50
zmax=0.50
[output]
format=h5sph
name=testThreeBox
split=yes
Simply adjusting the Crixus configuration to create an offset to the walls in the order of dr, as per:
[mesh]
stlfile=/home/pbrady/jobs/2018-0002/cad/testThreeBox.stl
dr=0.03
swap_normals=false
zeroOpen=false
[fill_0]
option=box
xmin=0.015
ymin=0.015
zmin=0.015
xmax=0.50
ymax=0.50
zmax=0.50
[output]
format=hsph
name=testThreeBox
split=yes
fixed the problem, as can be seen in the video below. I suspect that this dr offset can be tuned but I’ll check that out later.
My hindsight logic for this is pretty simple: the GPUSPH code was set with walls and minimum particle spacing of 0.03m, which for the initial conditions I’d mathematically forced much smaller than this distance. Hence, the code was computing much higher, unphysical even, forces due to the unphysical particle spacing.
Like everything, the solutions is trivial once you learn the knack. Besides, if I’d used the alternate STL fill method in Crixius this would probably have been avoided as the Crixius manual clearly states to set the wall distance (dr) to match the particle spacing in GPUSPH. That filling method is perhaps a post for next time.
Finally, this work was undertaken as a collaboration with Dr Matthew Gaston and Associate Professor James Ball at the UTS Faculty of Engineering and IT.
Finally, thanks for reading this article and please leave a comment below. If you are interested in being updated when similar items are posted then either subscribe via RSS or sign up to my mailing list below.
1 comments On GPUSPH Initialisation From Crixus With Boxes Near the Wall
Pingback: High Resolution Simple Dam Break in GPUSPH – Open Fluids ()
Comments are closed.